Power management is crucial for safe travel, easy camping, and extending battery life in an RV. One key device in managing power is the RV battery disconnect switch. While many new RV owners hear about this switch, they often lack a full understanding of what it is, when to use it, and how to install it. Even campers with factory-installed disconnect switches may experience issues like battery drain, wiring problems, or switches not functioning properly.
This guide provides clear, simple information on the RV battery disconnect switch. You’ll learn what it is, how it works, when to turn it on or off, where to find it, and how to install it. It also covers common problems you might encounter. The goal is to offer easy-to-understand instructions, presented in short sentences, step-by-step guides, and helpful examples.

What is an RV Battery Disconnect Switch?
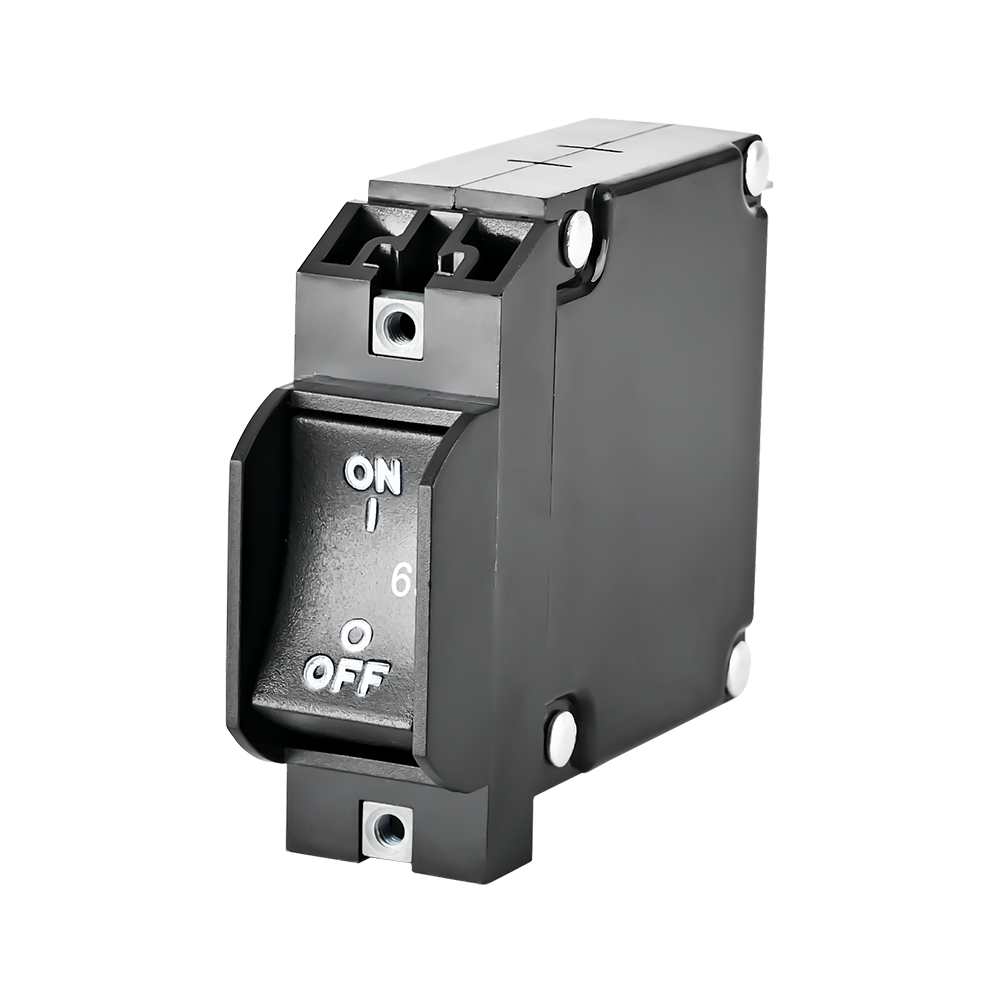
The RV battery disconnect switch is a small gadget that enables one to sever the power connection between the RV battery and the electrical system of the RV. It functions as a safe ON/ OFF button to the RV battery. On turning the switch to OFF, the battery is isolated, and no power is supplied to the RV. The RV can be used in battery mode with the ON button.

Some people call it:
- RV battery cut-off switch
- RV battery kill switch
- Camper battery shut-off switch
- Battery disconnect switch for RV
- Camper Battery Disconnect Switch
They all mean the same thing.
The purpose is simple: stop battery drain when the RV is not in use.
Every RV has small devices that continue to use power even when the RV is turned off—such as detectors, LED indicators, radios, antenna boosters, routers, and control boards. These can drain the battery slowly if not disconnected. A disconnect switch protects the battery from this slow drain.
What Does the Battery Disconnect Do on an RV?
Many RV owners wonder:
What does the battery disconnect do on an RV, and why is it important?
Here are the key benefits:
- Stops Parasitic Battery Drain: Even when everything seems off, the RV still uses a small amount of power. A battery disconnect stops this hidden drain.
- Protects the Battery When the RV is Stored: If your RV sits for weeks or months, the battery can die. A disconnect switch keeps the battery healthy by cutting the connection.
- Helps With Maintenance and Repairs: When working on wiring or appliances, it’s essential to disconnect the battery for safety. The disconnect switch allows you to do this quickly and safely.
- Prevents Accidental Short Circuits: When the battery is isolated, the risk of sparks, shorts, or accidental power flow is much lower.
- Extends Battery Life: By avoiding deep discharge, the battery lasts longer.
How Does an RV Battery Disconnect Switch Work?
The RV battery disconnect switch works by creating a physical break in the battery circuit.
When the switch is ON, electricity flows from the battery to the RV.
When the switch is OFF, the circuit opens and stops power flow.
There are two common types:
Simple ON/OFF Switch
Used in many RVs, boats, and trucks.
This switch only has:
- ON (connect battery)
- OFF (disconnect battery)
Battery Selector Switch (1–2–BOTH–OFF)
Used in dual battery setups.
This type allows:
- Battery 1 only
- Battery 2 only
- Both batteries together
- OFF
Selector switches are common in marine systems and can also be used in RVs with house and starter batteries.
Both types work manually. You turn a knob to open or close the connection.
Types of RV Battery Disconnect Switches
Based on design and purpose, RV battery disconnect switches come in different types.
Simple Rotary ON/OFF Switch
These switches are straightforward to operate, typically offering an ON/OFF control. They may come with waterproof designs to withstand outdoor conditions.

Best For: Single-battery RVs.
Pros: Simple, easy-to-use, cost-effective.
Dual Battery Selector Switch (1–2–BOTH–OFF)
It allows you to choose between using one battery (1), the other (2), or both (BOTH) for power, with an OFF position to disconnect entirely.

Best For: RVs with two battery banks.
Pros: Helps maintain battery life by managing the two batteries separately, ensuring you don’t drain both at the same time.
Push Button Disconnect Switch
These switches offer automatic functionality with easy push-button activation. Some may include features like remote operation, or integration with RV systems for smart power management. They are also widely used in AGV systems, forklifts, and golf carts.

Best For: Modern motorhomes with more advanced electrical systems.
Pros: Convenient and suitable for modern RV setups, providing added features like automation.
Keyed Battery Disconnect Switch
This switch requires a key to operate, making it more secure than other types.

Best For: Security-conscious RV owners.
Pros: Prevents unauthorized use or battery drain when you’re not around.

As a wholesale battery disconnect switch manufacturer, ELEHUB offers high-quality ON/OFF Switches, Selector Switches, and Push Button Disconnect Switches designed for RV applications. Perfect for single or dual battery setups, these switches are built for durability and reliable performance. ELEHUB’s switches provide efficient power management and are ideal for ensuring RVs’ electrical safety and longevity. Contact us today!
When to Use the Battery Disconnect on an RV
Knowing when to use the RV battery disconnect switch is important for safety and battery health.

Turn the Disconnect Switch OFF When:
- The RV is in storage
- The RV has been parked for more than a few days
- You are working on the electrical system
- You want to prevent battery drain
- You want to stop power during maintenance
Turn the Disconnect Switch ON When:
- You are using the RV
- You need interior lights, water pumps, slides, or appliances
- The RV is traveling
- You are charging the battery through solar, an alternator, or converter
RV Battery Disconnect Switch ON or OFF When Plugged In?
This is a common question, and the answer is simple:
If your RV is plugged into shore power, keep the battery disconnect switch ON.
Why?
- The RV converter charges the battery when the switch is ON.
- If the switch is OFF, the battery may not charge.
So, leave it ON when plugged in, unless your RV design says otherwise. Most modern RVs require the switch ON for charging.
RV Battery Disconnect Switch Location
The location of the switch depends on the RV model. Here are common locations:
- Near the battery compartment
- Inside a front storage bay
- Near the entry door panel
- Next to the 12V fuse panel
- Under the bed or dinette (for trailers)
- Next to the power inverter
Some switches are hidden for safety. If you cannot find it, check your RV manual.
Simple RV Battery Disconnect Switch Wiring Diagrams
1. Single-Battery System (Manual Disconnect Switch)
In a basic RV setup with one battery, the wiring is very simple.
The battery has a positive cable and a negative cable. The negative cable usually goes directly to the RV chassis as ground. The positive cable is the one we control with the disconnect switch.
To wire the system, the positive cable from the battery goes into one side of the disconnect switch. Then another cable goes from the other side of the switch to the RV’s main power distribution or fuse panel. When the switch is in the OFF position, the battery stops sending power to the RV. When the switch is ON, electricity flows normally.
This setup is perfect for small RVs, travel trailers, and vans.

2. Multi-Battery System (Parallel Connection With Disconnect Switch)
If your RV uses two 12V batteries connected in parallel (positive-to-positive and negative-to-negative), they act as one big battery. In this case, both batteries still share a single disconnect point.
To wire this, the two positive posts are linked together with a heavy cable. From one of these positive posts, a cable goes to the disconnect switch. The other side of the disconnect switch connects to the RV’s power input. The negative posts remain connected to the chassis or ground.
This design makes sure both batteries are disconnected at the same time when you turn the switch OFF. It keeps them safe from parasitic drains and helps them stay healthy during storage.

3. Multi-Battery System (Series Connection for 24V Solar Conversions)
Some RV owners using large solar systems connect two 12V batteries in series to create 24V power. In this method, the negative terminal of one battery connects to the positive terminal of the second battery. The remaining free positive and negative posts provide the full 24V output.
Here, the disconnect switch is installed on the main positive line that comes from the battery pair. The positive wire leaves the battery bank, passes through the disconnect switch, and then goes to the RV’s 24V inverter or power system. Turning OFF the switch cuts the combined 24V supply instantly.
This setup is used in larger off-grid campers, expedition rigs, and solar-powered Class A motorhomes.
4. Battery Disconnect With Solar Charge Controller
If your RV has solar panels, the battery disconnect wiring changes slightly. The solar charge controller has two sides: one connected to the solar panels, and the other connected to the battery.
The disconnect switch must be placed on the positive line between the battery and the RV—not between the battery and the solar controller. The solar controller should always remain connected to the battery unless you manually disconnect its own terminals.
So the correct flow is:
Battery → Disconnect Switch → RV power system
Solar controller → Always directly connected to the battery
This setup protects the battery while ensuring the solar controller stays stable and safe.
5. Battery Disconnect With Inverter
When your RV uses an inverter to turn battery power into AC electricity, the inverter draws a lot of current even when it is not fully active. This is why adding a disconnect switch is important.
The positive wire from the battery goes to the disconnect switch, and from the switch, another heavy wire goes to the inverter’s main positive terminal. The negative wire usually goes directly from the battery to the inverter without passing through the switch.
With this design, turning the switch OFF cuts all power to the inverter and prevents any idle drain.
6. Chassis Battery Disconnect for Motorhomes
Motorhomes usually have two types of batteries:
- House battery for appliances
- Chassis battery for the engine
A chassis battery disconnect switch is wired into the positive cable leading to the engine’s starting system.
The positive terminal of the chassis battery sends power to the disconnect switch. From there, the power goes to the RV’s ignition system and dashboard. When you turn the disconnect OFF, all engine-related electronics stop receiving power, protecting the battery while the RV is parked.
This prevents the slow drain caused by engine computers, radios, alarms, and other small loads.
7. House Battery Disconnect for Large Motorhomes
In large RVs, a house battery bank often powers refrigerators, lights, pumps, fans, and entertainment systems. To install a disconnect switch, the positive output cable from the house battery bank is routed through the switch before going to the RV’s main fuse panel.
Switch OFF = no power flows to house appliances
Switch ON = normal operation
This wiring helps protect the battery bank when the RV is in storage or parked long-term.
8. Dual Disconnect System (One for Chassis, One for House)
Some RVs need two separate disconnect switches—one for the house battery and one for the chassis battery.
In this design, each battery bank has its own positive cable routed through its own disconnect switch. Both switches work independently. You can turn OFF the house system while keeping the engine battery active, or turn off both when storing the RV.
This layout gives full control and maximum safety for long-term storage or maintenance work.
9. Automatic RV Battery Disconnect (Smart Systems)
Modern RVs sometimes use automatic disconnect systems. These use relays or smart shunts that cut power when battery voltage drops too low. The wiring includes a control module connected between the battery’s positive terminal and the RV’s power line.
When the voltage is above the safe limit, the relay stays closed, and power flows normally. When the voltage falls below the preset limit, the relay opens and disconnects the battery automatically. These systems protect lithium batteries especially well.
10. Disconnect Switch With Fuse Protection
For maximum safety, some RV owners add a fuse or circuit breaker near the battery. In this setup, the positive cable from the battery first goes through a fuse or breaker, then into the disconnect switch, and finally into the RV’s main power input.
This protects the RV from short circuits and allows safe isolation of the battery whenever needed.
Should an RV Battery Disconnect Switch Be on Positive or Negative?
You can install a disconnect switch on either terminal, but:
- Positive is more common
- Negative is safer for beginners
If installed on the positive, it cuts the main power feed completely. If installed on the negative, it breaks the ground connection, which also stops power.
If your RV uses smart chargers, inverters, or solar systems, it is better to use a positive-side disconnect.
How to Install an RV Battery Disconnect Switch
Here is a simple, safe way to install a battery disconnect switch in an RV.
Things You Will Need:
- Disconnect switch (ON/OFF or selector type)
- Battery cables or heavy-duty wires
- Cable lugs
- Heat shrink
- Wrench set
- Mounting screws
Installation Steps (Easy Method):
Step 1: Disconnect the Battery
Turn OFF all appliances. Remove the negative cable first.
Step 2: Choose the Mounting Location
Pick a place that is:
- Easy to reach
- Safe from heat or water
- Close to the battery
Step 3: Run the Main Positive Cable to the Switch
Cut the positive cable. Attach the first end to the switch input terminal.
Step 4: Connect the Output Cable
Attach the second cable from the switch output terminal to the RV positive system feed.
Step 5: Secure the Switch
Use screws to mount the switch firmly.
Step 6: Reconnect the Battery
Attach the negative cable again.
Step 7: Test the Switch
Turn the knob:
- ON → lights and appliances should work
- OFF → RV should lose battery power
If everything works, installation is complete.
Common RV Battery Disconnect Switch Problems
Even though the RV battery disconnect switch is simple, problems can still happen. Many RV owners report issues like the switch not working, battery still draining, or the RV losing power even when the switch is ON.
Here are the most common problems and what causes them.
1. RV Battery Disconnect Switch Not Working
Sometimes the switch does nothing. You turn it ON, but no power reaches the RV. Or you turn it OFF, but power keeps flowing.
Possible reasons:
- Loose battery cables
- Corroded terminals
- Damaged internal switch contacts
- Wrong wiring connection
- Blown fuse near the switch
- Switch mounted on the wrong side of the battery
How to fix it:
- Tighten all cable lugs
- Clean terminals with a wire brush
- Check fuses and replace if blown
- Confirm that the switch is wired to the positive or negative (based on your RV system)
- Replace the switch if the internal contacts are burned
2. RV Battery Still Draining Even When Switch Is OFF
This is a very common issue. The RV battery still loses power even after turning the disconnect switch to OFF.
Why this happens:
- The RV has multiple battery circuits
- One circuit is bypassing the disconnect switch
- The disconnect switch is only cutting one feed
- The solar controller is still pulling power
- The inverter or converter is wired directly to the battery
How to fix it:
- Trace the wiring to make sure all battery feeds pass through the switch
- Check for extra wires directly connected to the battery positive
- Install a second disconnect if needed
- Add a fuse block to group all power lines together
3. RV Battery Disconnect Switch Gets Hot
If the switch heats up during use, this is a warning sign.
Possible causes:
- Loose cable causing resistance
- Undersized switch for high-current loads
- Poor-quality internal contacts
- Corroded wires
Solution:
- Re-tighten connections
- Ensure the switch is rated for 150A–300A continuous
- Replace corroded lugs
- Upgrade to a heavy-duty marine-grade switch
4. RV Has No Power With the Switch ON
You turn the switch ON, but nothing in the RV works.
Possible causes:
- Dead battery
- Faulty battery connections
- Loose ground wire
- Blown 12V fuse
- Burnt contact inside the switch
Solution:
- Test battery voltage
- Inspect all wires
- Replace the switch if the internal contact has failed
5. Switch Knob Hard to Turn
Over time, dust, moisture, and oxidation can make the knob stiff.
Possible Causes:
- Dirt or debris buildup
- Corrosion or oxidation inside the switch
- Worn-out internal mechanism
Solutions:
- Spray with an electrical-safe lubricant
- Tighten the front nut
- Replace if the internal mechanism is worn
Troubleshooting RV Battery Disconnect Switch (Step-by-Step)
If your RV battery disconnect is not working properly, follow this simple troubleshooting method.
Step 1: Check Battery Voltage
Use a multimeter.
- A healthy battery should read 12.4V–12.8V.
- If it is below 12V, charge it before testing the switch.
Step 2: Inspect the Cables
Make sure cables are:
- Tight
- Clean
- Rust-free
- Connected to the correct terminals
Loose cables often cause the most disconnection problems.
Step 3: Test the Switch
Turn the switch ON.
Check the voltage at the RV’s fuse panel.
- If there is no voltage → switch issue
- If there is a voltage → wiring issue
Step 4: Check for Bypass Wires
Look for extra wires connected directly to the battery.
These can bypass the disconnect switch completely.
Fix: Route these wires through the switch or install a second switch.
Step 5: Inspect Fuses and Breakers
Some RVs have a fuse near the battery that may blow if the switch is overloaded.
Replace if needed.
Step 6: Test the Ground Connection
Bad ground will cause power loss even if the switch works fine.
Clean the ground bolt and re-tighten.
Step 7: Replace the Switch If Needed
If contacts inside the switch burn out, the switch will not pass power through.
Replace with a heavy-duty model rated at 150A–300A.
Best Practices for Using an RV Battery Disconnect Switch
To keep your battery healthy and protect your RV electrical system, follow these simple tips.
1. Turn the Switch OFF When Storing the RV
This protects the battery from slow drain and keeps it charged for longer.
2. Keep It ON When Using the RV
Lights, water pumps, slides, and other appliances need battery power to work.
3. Keep It ON When Plugged Into Shore Power
Most RVs charge the battery only when the switch is ON.
4. Use Marine-Grade Switches for Better Safety
Marine switches are designed for moisture, vibration, heat, and high-amperage loads. They are reliable for RVs.
5. Check the Switch Every 30–45 Days
Look for:
- Loose cables
- Rust
- Cracks
- Heat marks
A quick inspection prevents future failures.
6. Mount the Switch Close to the Battery
This reduces cable length and improves safety.
7. Label the Switch
Write “ON” and “OFF” clearly so everyone knows how to use it.
8. Disconnect Battery Before Working on RV Electronics
This prevents sparks and electrical damage.
Conclusion
The RV battery disconnect switch is a small but very vital product. It keeps your RV battery safe, prevents unwanted drain, and ensures the safety of your electrical system. It is either a simple ON/OFF switch or a selector switch, but either way, it is part of RV power management. With knowledge of how the switch works, installing and using it is not difficult.
Under the proper arrangement, your battery will have a long life, your RV will be secure, and your electrical system will operate efficiently. In case of some issues, most of the issues could be sorted out with just simple troubleshooting. Always use a good quality and rated switch and ensure that it is checked regularly.
This guide contains all the essential information on operation, installation, usage, and troubleshooting, so you can travel with confidence and enjoy a hassle-free RV experience.
FAQs
What is the battery disconnect on an RV?
It is a switch that separates the RV battery from the RV electrical system. It stops battery drain when the RV is not in use.
What is the battery disconnect switch for on a camper?
It prevents parasitic drain, protects the battery, and makes maintenance safer.
How does an RV battery disconnect switch work?
It opens or closes the circuit between the battery and the RV.
ON = power flows
OFF = power stops
How to wire an RV battery disconnect switch?
The wiring diagram for a battery disconnect switch is easy to understand. The switch is placed between the battery and the RV’s positive cable.
Basic Wiring Steps:
- Positive cable from battery → goes to switch input terminal
- Switch output terminal → goes to RV power distribution or fuse box
- Ground wire is unchanged
- Tighten lugs and secure cables
Most RVs disconnect the positive side, but some systems disconnect the negative side. If you are unsure, follow the wiring layout of your RV.
Should the RV battery disconnect be ON or OFF?
ON when camping, traveling, or plugged in. OFF during storage or long-term parking.
Where is the battery disconnect switch located on the RV?
Typically near the battery bay, storage area, entrance panel, or under the bed.
Should the switch be positive or negative?
Both work, but the positive side is most common in RVs with dual systems.
Why does my RV battery disconnect switch keep failing?
It may be undersized, poorly wired, corroded, or overloaded.